Whether you love the smoky flavor of the grill or the cozy comfort of the oven, these five easy methods make it simple to get juicy and flavorful results every time.
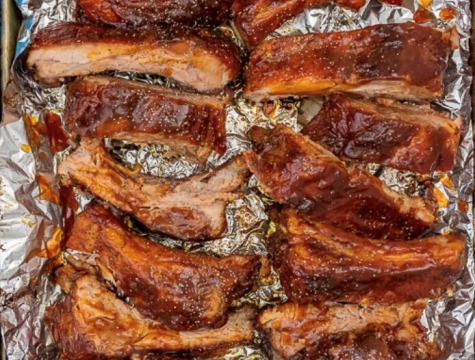
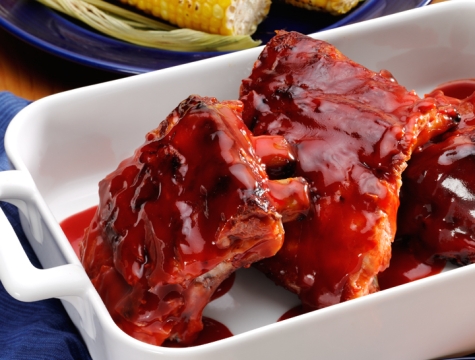
When people talk about “fall-off-the-bone ribs,” they’re describing that perfect, melt-in-your-mouth tenderness that makes every bite unforgettable. True fall-off-the-bone ribs are cooked low and slow until the meat gently pulls away from the bone with the slightest tug. While everyone has their own preference for tenderness, the goal is always the same—ribs so juicy, tender, and flavorful they practically serve themselves. Let’s explore how you can make fall-off-the-bone ribs, starting with choosing your ribs.
Choosing the best cut of ribs
Not all ribs are created equal, and each cut brings its own character to the table. The best choice depends on the flavor, texture, and cooking method you have in mind. Baby back ribs and spareribs are wonderfully versatile and work well for grilling, smoking, oven baking, or slow cooking. Many pitmasters recommend St. Louis–style ribs1, 2 for their meaty texture and consistent shape, making them ideal for grilling and smoking. For slow-cooked, fork-tender comfort, country-style ribs3 are another excellent option.
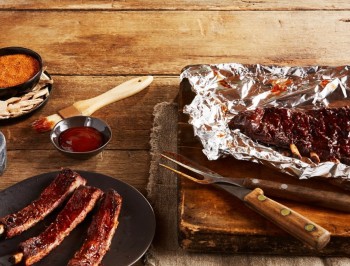
Wrapping in foil or butcher paper to retain moisture
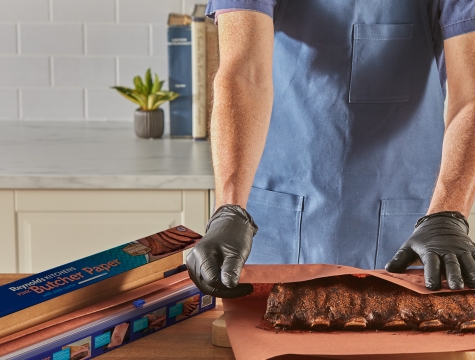
Wrapping your ribs in foil or butcher paper is a time-honored trick for keeping them tender and juicy. This simple step locks in moisture, helping the meat stay soft while allowing you to add even more flavor with ingredients like apple juice, vinegar, honey, butter, or your favorite sauce. Wrapping can also help the ribs push through the “stall,” a point where the temperature plateaus and cooking seems to slow down.4, 5 Foil works beautifully for both grilling and smoking, while butcher paper is ideal for low-and-slow smoking, allowing just enough airflow for that signature smoky flavor to permeate your ribs.
Cooking them low and slow using the 3-2-1 method
The secret to truly tender, fall-off-the-bone ribs is cooking them low and slow. The popular 3-2-1 method ensures perfect texture and flavor every time. First, smoke the ribs unwrapped for three hours to build a deep, smoky flavor. Then, wrap them in foil or butcher paper for two hours to lock in moisture and tenderness. Finally, uncover them for the last hour to let the sauce caramelize and form that beautiful, flavorful sticky consistency. The result: juicy, tender ribs with just the right amount of bite.
How to wrap ribs in foil
Tear a sheet of Pitmaster’s Choice foil that is about 1 foot longer than your rack of ribs. Place your ribs in the center of the foil. Fold the lengthwise edges together and fold them down to seal foil. Fold in the short edges to form a packet.
1. How to cook ribs on the grill in foil (up to 2 hours)
Grilling is one of the easiest and most flavorful ways to enjoy tender, juicy ribs. Whether you’re making foil-wrapped ribs on a charcoal or gas grill, cooking them in foil helps lock in moisture, enhance flavor, and ensure even cooking. If you’ve ever wondered how to BBQ ribs on a gas grill, this simple method delivers smoky, fall-off-the-bone perfection every time.
Here’s how to cook ribs on a gas grill using foil for tender, flavorful results that are sure to impress.
Blot the ribs dry with paper towels and remove the membrane from the back of the ribs using a butter knife
Prepare your dry rub seasonings, sauces, and marinades, and set aside
Tear off a sheet of foil that’s nearly an arm’s length for a full rack of ribs
Lay the ribs on the foil, meat side up
(Optional) Slather the ribs with oil or mustard to help your dry rub adhere
Generously season the entire rack of ribs with the dry rub
Preheat your grill to 325°F
Tear off a sheet of foil that’s nearly an arm’s length for a full rack of ribs
Lay the seasoned ribs on the foil, meat side up
Fold the two lengthwise edges over the ribs one at a time. Roll up the remaining edges to create a tightly sealed packet
Place the foil-wrapped ribs seam-side up on the grill using grill gloves and tongs. Close the grill and allow the ribs to cook for approximately 60 to 75 minutes. Depending on your grill, as well as the size of your racks, you may need up to 2 hours for the ribs to cook fully
Experts suggest cooking them until the internal temperature reaches 195°F to 205°F for the best tenderness
Serve or brush ribs with additional sauce if desired
Tip: How to remove the membrane from pork ribs–slide a butter knife under the membrane of one of the ribs to tear up a portion of the membrane. With your fingers and a paper towel, grab the membrane and tear down the length of the ribs.
Tear a sheet of foil, fold it into a ball, and use it to clean your grill grates afterward for easy cleanup!
2. How to smoke ribs on a smoker (5 to 6 hours)
For ribs that are juicy, tender, and rich with smoky flavor, nothing beats the low-and-slow method of smoking. Whether you’re using a traditional smoker or turning your gas grill into a smoker, the 3-2-1 method works beautifully for both. Just remember—when using a gas grill, stick with foil for the wrapping step, while either foil or butcher paper works well in a smoker.
Pat the ribs dry with paper towels and remove the membrane from the back of the ribs using a butter knife
Prepare your dry rub seasonings, sauces, and marinades, and set aside
Slather your ribs on all sides with a binder such as oil or mustard (optional)
Generously season the ribs with your prepared dry rub
Let the ribs rest for 30 minutes to allow the seasonings to penetrate the meat
Preheat your smoker to 225°F using aromatic woods like oak, hickory, maple, mesquite, applewood, or cherry wood chips, chunks, or logs.6 It’s your choice which woods you prefer
Then, follow the 3-2-1 method to smoke your meat: cook for 3 hours uncovered, then wrap it in butcher paper and cook for 2 hours. Unwrap and cook for an additional 1 hour. Timing may be shorter or longer, depending on the type, size, and other factors
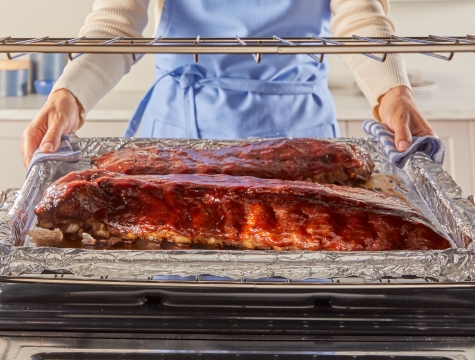
There’s something comforting about oven-baked ribs—the slow heat filling your kitchen with that irresistible, savory aroma. With a little time and care, learning how to make ribs in the oven rewards you with tender, fall-off-the-bone meat that’s rich, flavorful, and ideal for gathering around the table. With these simple steps and a little help from Reynolds Wrap® Heavy Duty Foil, you’ll achieve tender, flavorful results every time.
4. How to make ribs in an oven bag (1 ½ to 2 hours)
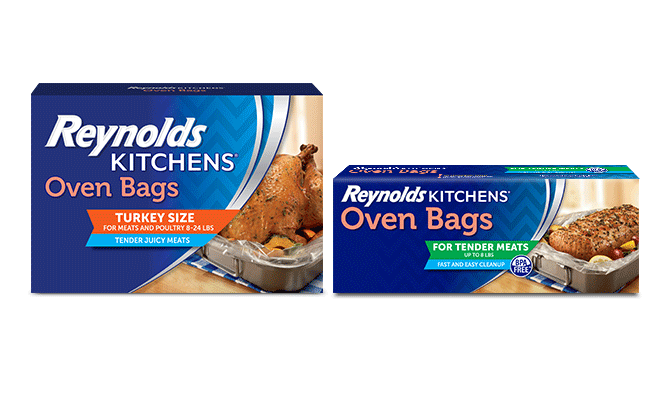
For tender, juicy oven-baked ribs with easy cleanup, try making them in a Reynolds Kitchens® Oven Bag. This simple method locks in moisture and flavor, giving you perfectly baked ribs that are fall-off-the-bone delicious—no fuss, no mess.
Ready to get cooking? Here’s how to bake ribs in an oven bag for juicy, flavorful results and effortless cleanup.
Pat the ribs dry with paper towels and remove the membrane from the back of the ribs using a butter knife
Prepare your dry rub seasonings, sauces, and marinades, and set aside
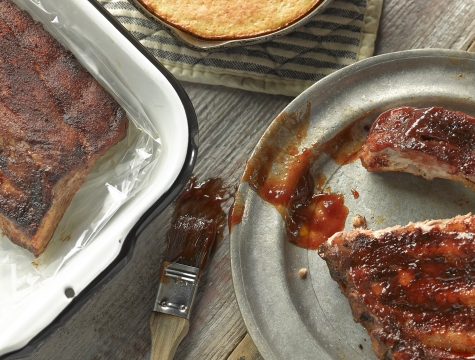
Place ribs on a double sheet of wax paper for easy cleanup. Generously season your ribs with your prepared dry rub. After applying the rub, coat your ribs with your favorite barbecue sauce
Prepare your Turkey-size Oven Bag by adding 1 tbsp of flour and 2 tablespoons of water into the bag, then squeezing to blend into a paste. Place it on a large baking pan with 2-inch or taller sides, large enough to fit your ribs
Place the ribs inside the oven bag, securing the contents with the provided tie in the box. Tuck the top of the bag under the side of the ribs
Place in the refrigerator to marinate for at least 1 hour, if time allows
Preheat oven to 350°F when ready to cook
Cut six slits along the top of the oven bag
Place the oven bag ribs on the baking pan in the oven and cook for 1 1/2 hours
Remove from bag and allow to rest for 3-5 minutes before applying additional barbecue sauce as desired
5. How to cook ribs in a slow cooker (4 to 6 hours)
When you want tender, flavorful ribs without tending the grill, slow cooker ribs are the perfect solution. With only a few ingredients and minimal effort, you’ll get tender, fall-off-the-bone ribs that taste like you’ve been cooking all day.
Follow these simple steps for melt-in-your-mouth delicious slow cooker ribs that are easier to clean up, too. Wrap your leftover ribs in aluminum foil and place them in the fridge. Scoop out any remaining juices with a ladle, then remove and discard the liner.
Place a regular-sized slow cooker liner inside a 5- to 6 ½-quart slow cooker bowl
Fit the liner snugly against the bottom and sides of the bowl, then pull the top edges of the liner over the rim of the bowl
Pat the ribs dry with paper towels and remove the membrane from the back of the ribs using a butter knife
Prepare your dry rub seasonings, sauces, and marinades, and set aside
Cut ribs into four-rib sections. Coat each piece generously with your desired seasonings
Place ribs in the lined slow cooker and add ½ cup or the desired amount of barbecue sauce over ribs. Cover with the lid
Cook on LOW for 5-6 hours or HIGH for 3-4 hours
Carefully remove the ribs from the slow cooker and discard the cooking juices from the bag using a plastic ladle. (Do not lift the liner out of the slow cooker if it is full.) Return ribs to the slow cooker and add additional barbecue sauce. Cook for 1 more hour
The USDA recommends cooking pork to an internal temperature of 145°F for safe consumption.7 However, if you want to know what temp pork ribs are done, when they are truly moist and tender, continue cooking until they reach an internal temperature of 195°F to 205°F as measured with a food thermometer. That’s when the connective tissue breaks down, giving you perfectly juicy, tender ribs every time.
For the best flavor and texture, let your ribs rest for about 10 minutes before serving—this helps the juices settle and keeps every bite tender.
The fastest way to cook ribs is in the oven with an oven bag or foil-wrapped ribs on a medium temperature grill, both of which take less than two hours.
While both are delicious in their own right, pork and beef ribs each bring something unique to the table. Beef ribs are much larger and meatier, with rich marbling that gives them a hearty, steak-like flavor. Pork ribs, on the other hand, are smaller, leaner, and have a mild flavor like that of pork chops. When it comes to cooking, beef ribs typically take a bit longer due to their size and thickness, while pork ribs cook faster and are often more affordable, making them a popular choice for weeknight dinners or backyard barbecues.9
Beef back ribs and short ribs come from different parts of the cow and differ in meat, fat, and size. Back ribs are cut from the upper back and contain less meat, mostly between the bones, making them leaner. Short ribs, taken from the lower front rib cage, have more meat on top of the bones and a layer of fat that adds richness. Back ribs are usually longer, while short ribs come in various cuts, from thick English-style to thin flanken-style slices. Both can be cooked similarly, but if you substitute back ribs for short ribs, you may need to add extra fat to enhance the flavor.10
Yes—giving your ribs time to rest after cooking is an essential final step. While the USDA recommends at least 3 minutes,7 most BBQ experts suggest letting them rest for 10 to 15 minutes, either wrapped in aluminum foil or tented on a cutting board. This short wait makes the ribs easier to slice, allows the juices to redistribute for tender, juicy meat, and helps the sauce become tacky and flavorful—giving every bite that perfect finishing touch.
Tip: Keep your ribs warm and juicy while they rest by wrapping them in Reynolds Wrap® Everyday Aluminum Foil—it locks in heat and flavor until you’re ready to serve.