How to Cook Crispy Chicken Wings Without Flour or Cooking Oil
Many can’t resist the deliciousness of a deep-fried chicken wing but hate the mess. Here's the good news—there are some fantastic ways to enjoy perfectly crispy fried chicken wings right in your own kitchen, without a deep fryer!
There’s nothing like biting into a crispy fried chicken wing—that satisfying crunch followed by juicy, flavorful meat. Plus, with our two delicious methods, you don’t need the hassle and mess of a deep fryer to achieve wings that rival your favorite restaurant.
The secret to next-level crispy fried chicken wings lies in a few simple tricks: patting your wings completely dry before seasoning, sprinkling with baking powder (yes, really!), air-drying in the refrigerator overnight, giving them space to breathe while cooking, and using the right temperature to render out the fat and crisp up the skin. In the oven or convection oven, non-stick foil is your best friend—it prevents sticking and makes cleanup a breeze. Air fryer enthusiasts will love using air fryer liners for the same worry-free results.
Ready to make wings that’ll have everyone reaching for seconds (and thirds)? Let’s look at both ways so you can choose your favorite method for crispy, golden perfection.
How to fry chicken wings without flour and oil
Who knew you could cook crispy chicken wings without flour and oil? For both a convection oven and an air fryer, coating the wings with baking powder and letting them air-dry for a few hours or overnight in the refrigerator helps create more bubbling and blistering, similar to deep-fried crispy wings.
The secrets to crispy chicken skin
Always use fresh or completely thawed chicken wings
Thoroughly pat the wing skin dry with paper towels—you want the wings completely dry for maximum crispiness
Toss the wings with baking powder. Don’t use baking soda, as this can give your wings a metallic taste. Baking powder raises the skin’s pH, resulting in more effective browning and blistering, like the crispness you get with deep-fried wings
Air-dry the baking-powder-coated wings in the refrigerator, uncovered, for 3 hours or overnight. Drying out the wings will make them even crispier when baking
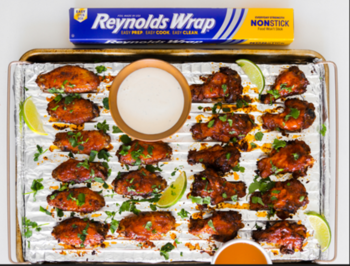
Line a sheet pan with Reynolds Wrap® Non-Stick Aluminum Foil with the non-stick (dull) side up. The foil prevents the wings from sticking to the pan and makes cleanup easy. If using an air fryer instead, line the basket with a Reynolds Kitchens® Air Fryer Liner to minimize sticking, ensuring food is placed on the liner at all times while cooking. Air fryer liners should be used in round or square basked air fryers only. They are not intended for oven use.
Fry using a convection oven or air fryer, or increase the temperature in a regular oven
Salt after baking, as pre-salting before baking can draw out too much moisture and keep the wings from crisping and browning1, 2
For more details, read on about how to make baked chicken wings in the oven and in the air fryer.
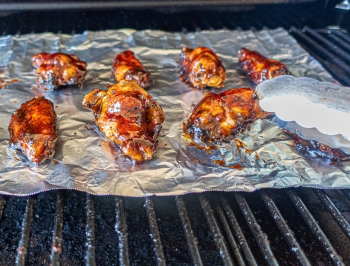
Method 1: Crispy baked chicken wings
These oven-baked beauties deliver the satisfying crunch of deep-fried wings without the oil, proving you can enjoy your crispy indulgence and feel good about it, too.
Step 1: Prepare your chicken wings and baking sheet
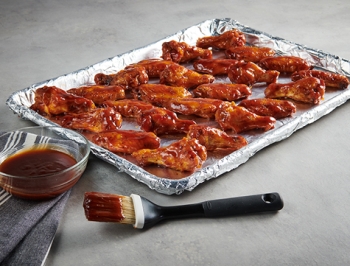
Thoroughly pat dry fresh or thawed chicken wings with paper towels. Line a baking sheet with Reynolds Wrap® Non-Stick Aluminum Foil, dull side up.
Step 2: Toss with baking powder
In a plastic bag or bowl, toss the wings with 1½ teaspoons of baking powder (not baking soda) per 1 pound of wings. Then, arrange the wings on the non-stick aluminum foil-lined sheet with the wings touching the non-stick (dull) side of the foil. Leave a bit of space between each wing. Refrigerate the baking powder-coated wings uncovered for 3 hours or overnight.
Step 3: Convection bake
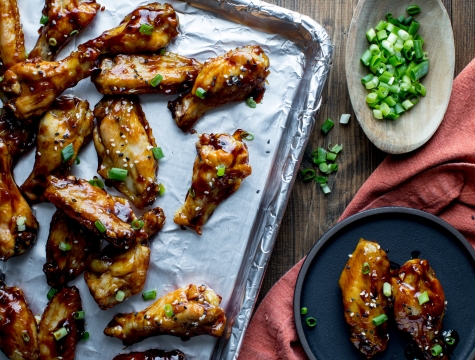
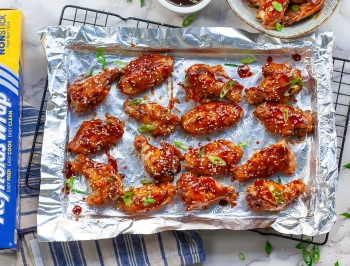
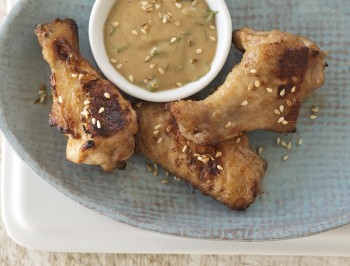
Preheat the oven to 425°F. Place the sheet pan of wings on the middle oven rack. In a convection oven, bake your wings at 450° for 20 minutes, flip them, then bake for another 20 to 25 minutes, depending on how crispy and golden-brown you prefer. If you do not have a convection oven or a convection setting, see the tip below for baking in an oven.3 [H4-image of wings tossed in sauce or seasoning] Step 4: Toss in sauce or dry rub seasoning Allow your crispy wings to cool for at least five minutes before tossing them in your favorite seasonings, sauce, or butter.
Step 4: Toss in sauce or dry rub seasoning
Allow your crispy wings to cool for at least five minutes before tossing them in your favorite seasonings, sauce, or butter.
Tip
No convection oven? You can bake them in a conventional oven with the following adjustments:
Place the oven rack in the upper-middle position and preheat the oven to 450°F
Cook chicken wings for 30 minutes
Flip the wings and continue cooking at 350°F until crisp and golden brown for 40 minutes longer2
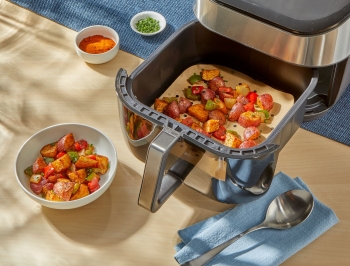
Method 2: Crispy air fryer chicken wings
The air fryer has quickly become a kitchen staple for good reason—it turns out quick, easy meals with minimal fuss. These crispy air fryer chicken wings are a great example of how this handy appliance can deliver restaurant-quality results in a flash.
Thoroughly pat dry fresh or thawed chicken wings with paper towels. Line a baking sheet with Reynolds Wrap® Aluminum Foil and place a wire cooling rack on top.
Step 2: Toss with baking powder
In a plastic bag or bowl, toss the wings with 1 teaspoon of baking powder (not baking soda) per 1 pound of wings. Toss the wings until lightly and evenly coated. Then, arrange the wings on the wire cooling rack with a bit of space between each wing. Refrigerate the baking powder-coated wings uncovered for 8 hours or overnight.
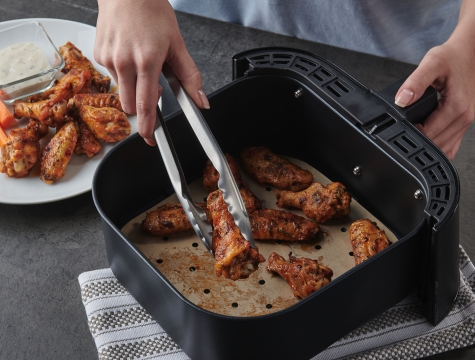
Step 3: Line the air fryer and add wings
Preheat your air fryer, without a liner, to 400°F, according to the manufacturer’s instructions. Once preheated, carefully line the basket with a Reynolds Kitchens® Air Fryer Liner and immediately place your baking-powder-coated wings on the liner, leaving space between each wing. Do not overcrowd the wings, or moisture will be trapped between them, leaving them less crispy.
Step 4: Air fry chicken wings
Air-fry your wings at 400°F for 20 to 30 minutes, flipping after about 15 minutes to ensure both sides are crisp.
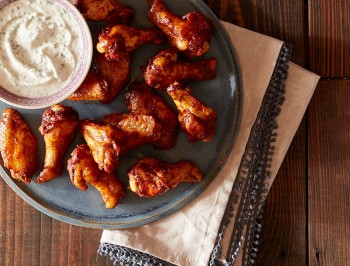
Step 5: Toss in sauce or dry rub seasoning
Allow your crispy wings to cool for at least five minutes before tossing them in your favorite seasonings, sauce, or butter. Serve immediately to enjoy that crispy bite!4
The key to achieving perfectly crispy baked chicken wings starts with moisture control: always use fresh or fully thawed wings, pat them bone-dry with paper towels, and toss them with baking powder (not baking soda) to raise the skin's pH for better browning and that deep-fried texture. For even crispier results, let your baking-powder-coated wings air-dry uncovered in the refrigerator for 3 hours or overnight to remove excess moisture.
When baking in the oven, line your pan with Reynolds Wrap® Non-Stick Aluminum Foil (dull side up). Cook at high heat, using convection if available.
Always salt wings after baking. Pre-salting draws out moisture, which can prevent that coveted crispy, golden finish.
Yes. Baking powder is a secret weapon for achieving that restaurant-quality crunch at home. Here's the magic behind it: baking powder raises the pH of the chicken skin, promoting beautiful blistering and crisping similar to what you'd get from deep-frying. It also draws moisture to the surface, leaving the skin drier, thinner, and delightfully crackly. As your wings bake, the baking powder encourages micro-blistering—tiny bubbles in the skin that deliver that irresistible crispy texture we all crave.
We don’t recommend it. Although they may look the same, baking soda and baking powder are different. Baking powder is a mixture of baking soda, cream of tartar, and cornstarch. Baking soda by itself can leave your wings with an unpleasant, bitter, metallic taste. Stick with baking powder for the crispiest results. You can even use aluminum-free baking powder, too!
Preheat your air fryer to 400°F, then cook for 20 to 30 minutes, flipping once halfway through. If using a Reynolds Kitchens® Air Fryer Liner, always preheat the air fryer without the liner, and place the liner in the basket only once it is weighed down with food.